Recently, while running the Chrome browser on Windows 11, users are getting an error message that reads ‘Allow Chrome to access the Network in your firewall’. This error message prevents users from running the Google Chrome browser. If you are someone who uses only Chrome to browse the web, you might find this error message very annoying & frustrating. So, if you are getting the ‘Allow Chrome to access the network in your Firewall’ error message, and looking for some help, you have landed on the right page.
Steps to Fix ‘Allow Chrome to Access the Network’ Error message
In this article, we will share a few best ways to allow Chrome to access the Network in your Firewall. The methods will be straightforward; just follow them as we have shared below. Let’s check out.
1) Configure the Windows Firewall
In this method, we will add an exception to the Windows Firewall to allow chrome to access the network firewall. Here’s what you need to do.
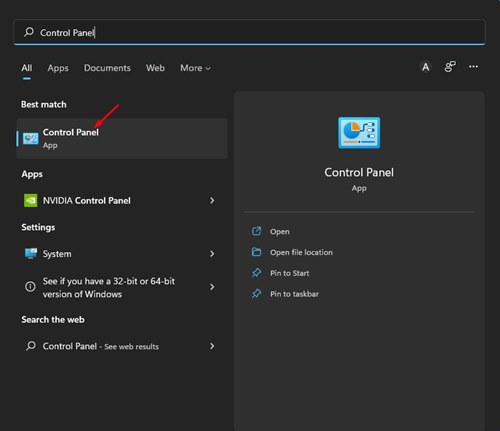
First of all, open the Windows 11 search and type in Control Panel. Next, click on the Control Panel from the list.
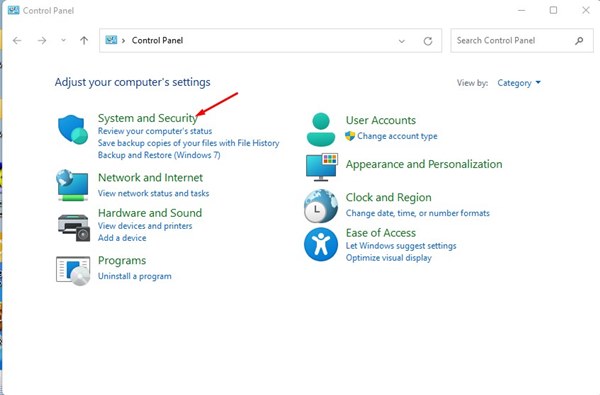
On the Control panel, find and click on the System and Security option as shown below.
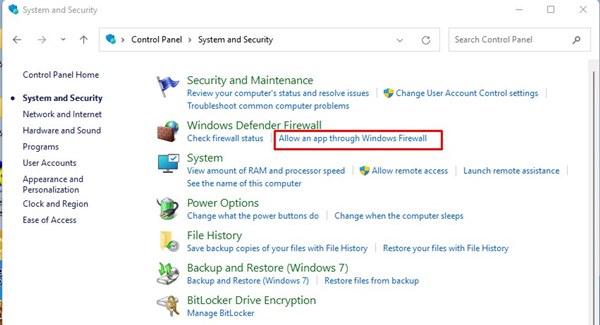
On the System and Security screen, click on the Windows Defender Firewall option.
On the left pane, click on the Allow an app or feature through Windows Defender Firewall.
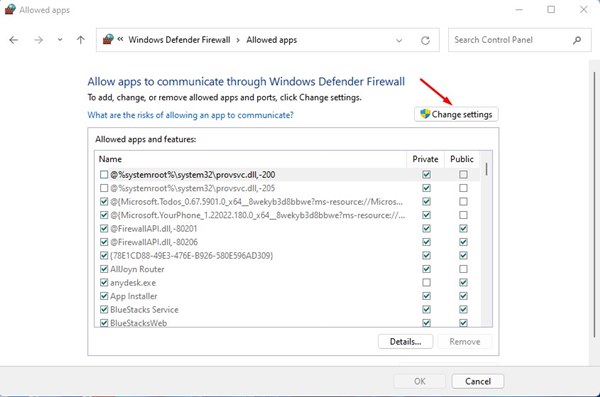
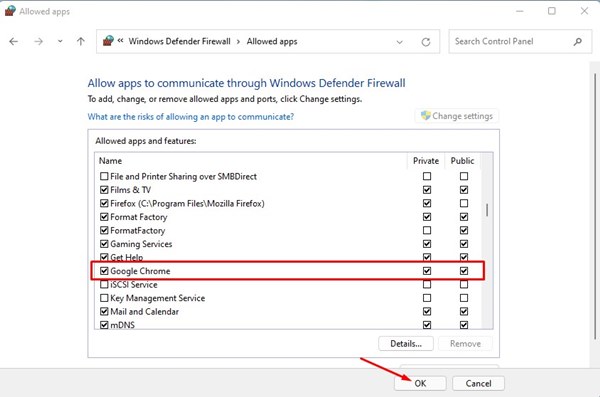
On the Allowed Apps Window, click on the Change settings button as shown below.
Next, check the checkbox for Google Chrome for both public and private. Once done, click on the Ok button.
That’s it! You are done. This is how you can configure Windows Firewall to allow chrome to access the network on your PC.
2) Exclude Google Chrome for Windows Security
After configuring Windows Firewall, you need to make a few changes to the Windows Security app to allow Chrome to access the internet. Here’s what you need to do.
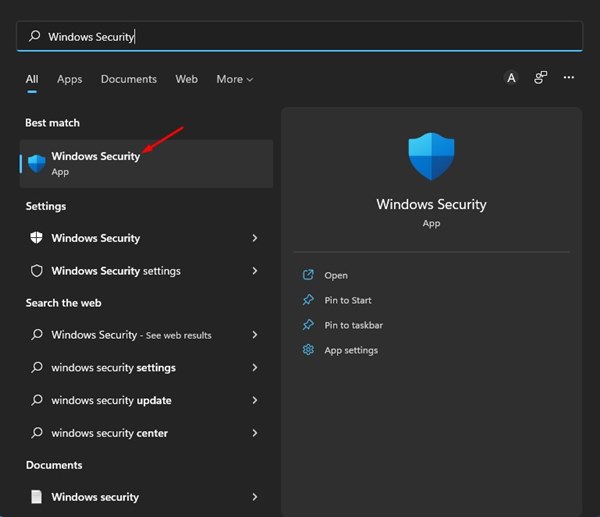
First of all, click on the Windows 11 search and type in Windows Security. Next, open the Windows Security app from the list.
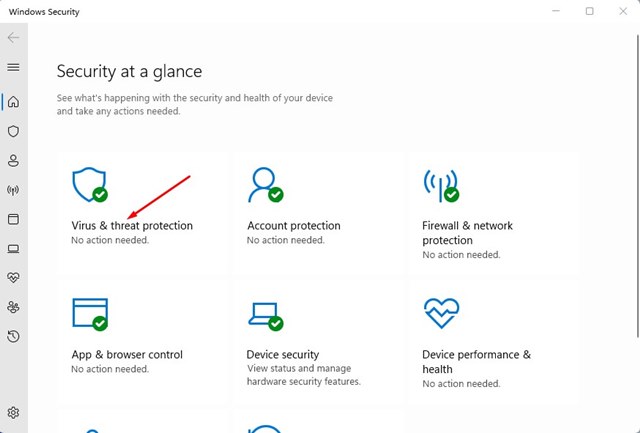
On Windows Security, click on the Virus & threat protection option as shown below.
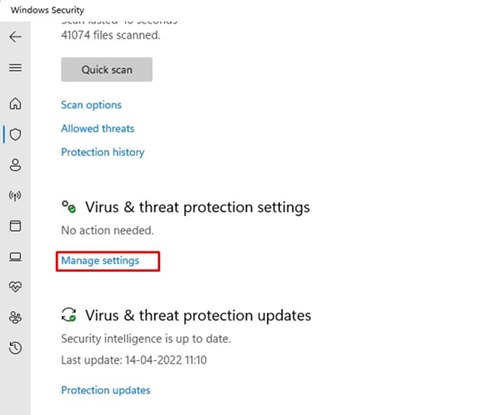
On the right, click on the Manage Settings option situated underneath Virus & threat protection settings.
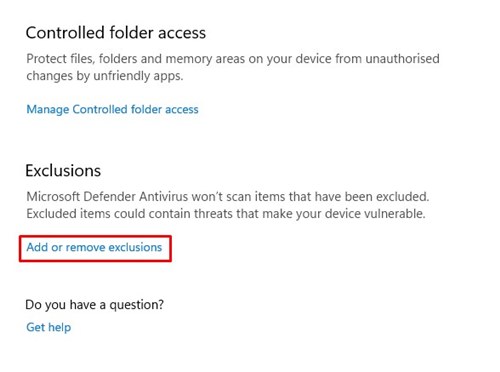
Now scroll down to the Exclusion tab and click on the Add or Remove exclusion option.
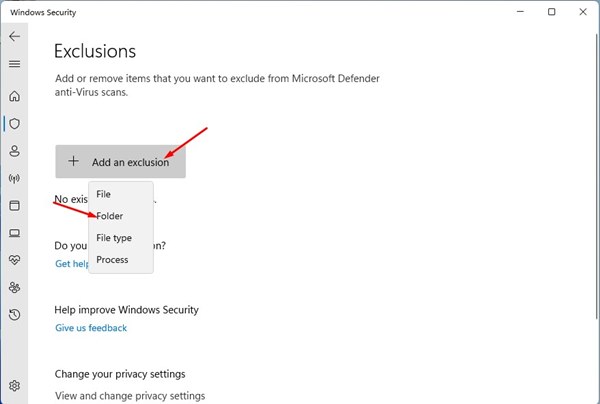
Now click on the Add an exclusion button as shown below and select the Folder option.
Now, on the file picker, you need to navigate to the C:\Program Files (x86) and select the Google Chrome folder. That’s it! You are done. Now Windows Security will no longer block Chrome from accessing your network. So, these are the best ways to allow Chrome to access the network. I hope this article helped you! Please share it with your friends also. If you have any doubts related to this, let us know in the comment box below.