For those who don’t know, Hibernate is pretty much similar to the Sleep, but instead of saving your open documents & apps to the RAM, hibernate mode saves them to your hard disk. Since it saves all data to the hard disk, it allows full shutdown. When you turn on the computer again, the Hibernate mode resumes everything where you left off. You can also check out our article – What Is The Difference Between Sleep Mode And Hibernate to know more details. So, Hibernate mode is indeed a useful feature, but for some reason, it had been removed from the Windows 10 Start menu.
Steps to Enable Hibernate Mode On Windows 10 computer
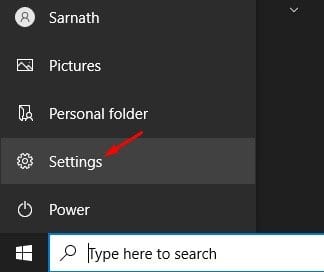
Although the Hibernate mode is not available on the Start menu, it doesn’t mean that the feature doesn’t exist. Windows 10 users can manually enable the ‘Hibernate’ option from the Power options. Below, we have shared a step-by-step guide on how to enable Hibernate mode in Windows 10 computers. So, let’s check out. Step 1. First of all, click on the ‘Start’ button and select ‘Settings.’
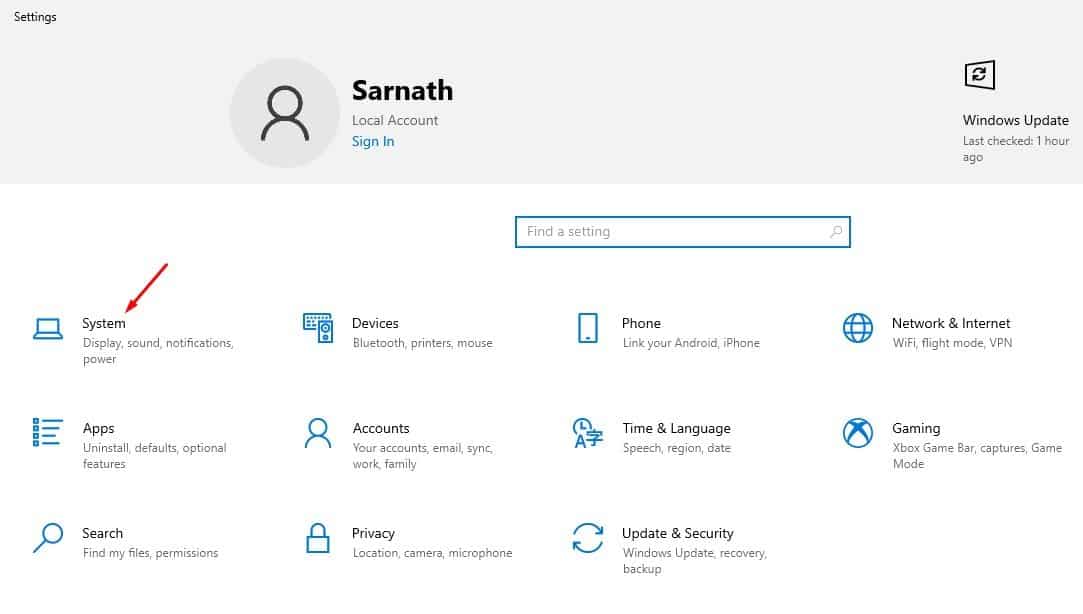
Step 2. On the Settings page, click on the ‘System.’
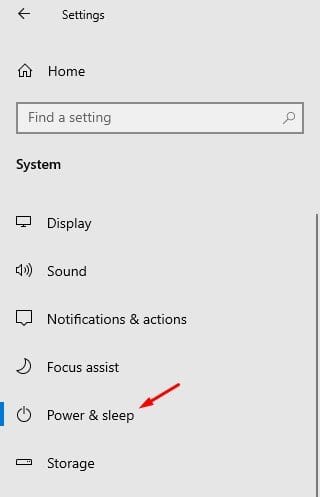
Step 3. Next, click on the ‘Power & Sleep’ option.
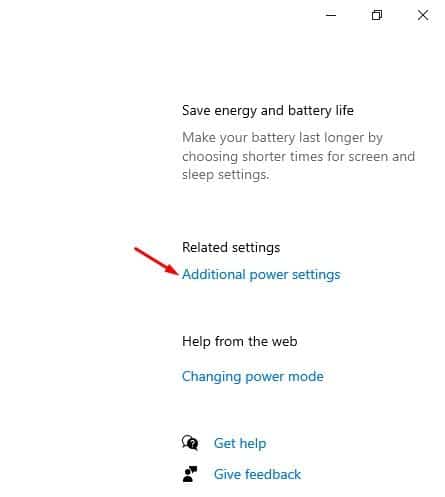
Step 4. Now on the right pane, click on the ‘Additional Power Settings’ option.
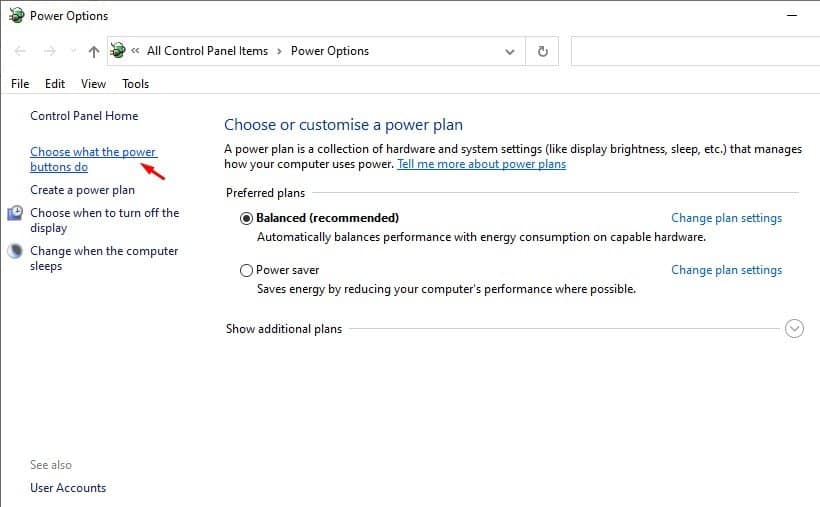
Step 5. This will open the Power Options page. Click on the ‘Choose what the power buttons do’ option.
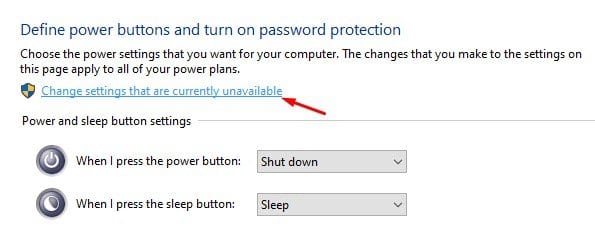
Step 6. Next, click on the ‘Change settings that are currently unavailable’
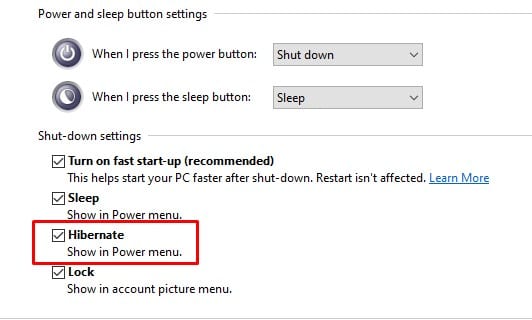
Step 7. Now check the Hibernate box and click on the ‘Save Changes’ button.
That’s it! You are done. This is how you can enable hibernate mode on Windows 10 computer. Now click on the Power button, and you will find the ‘Hibernate’ option there. So, this article is all about how to enable hibernate mode on Windows 10 computer. I hope this article helped you! Please share it with your friends also. If you have any doubts related to this, let us know in the comment box below.
