A fast Startup is an option introduced in Windows 10. It’s a feature that combines the hibernation and shutdown process to achieve faster boot times. This feature is handy if your PC takes a long time to boot into the login screen. If you already have SSD installed on your system, you might not notice the difference. However, if you have an HDD and limited RAM, you might notice a significant improvement in the boot time of Windows. Also, read Windows 11 Free Download Full Version ISO File 64 Bit & Beta Versions.
Steps to Enable Fast Startup On Windows 11
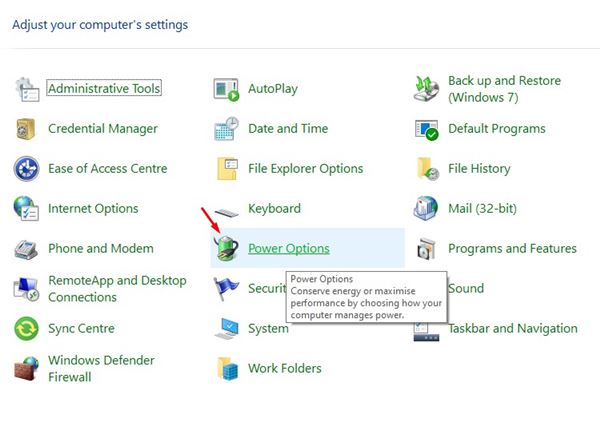
So, if you are interested in enabling the Fast Startup option on Windows 11, you are reading the right guide. This article will share a step-by-step guide on enabling Fast Startup on the latest Windows 11 operating system. Let’s check out. Step 1. First of all, open Windows 11 start menu and search for Control Panel. Then, open Control Panel from the list. Step 2. On the Control Panel, click on the Hardware and Sound option. Step 3. On the Hardware and Sound page, click on the Power Options.
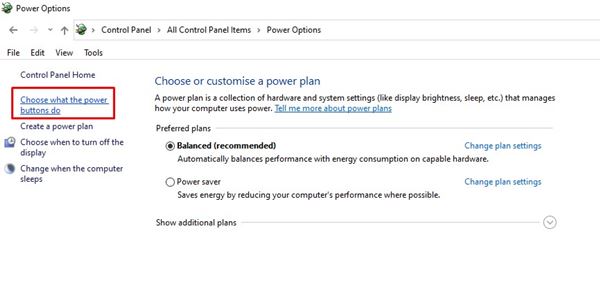
Step 4. Now, on the left pane, click on the Choose what the power button does option.
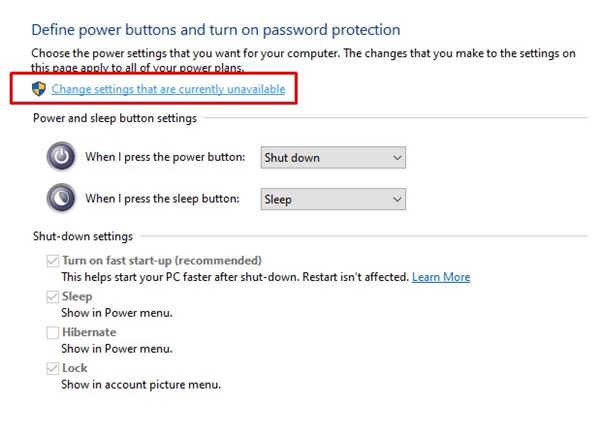
Step 5. On the next page, click on the Change Settings that are currently unavailable option.
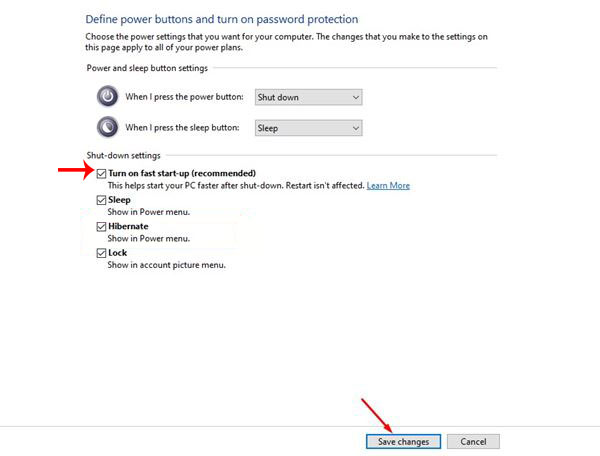
Step 6. On the next page, enable the option – Turn on Fast Startup (recommended)
Step 7. Once done, click on the Save Changes button. That’s it! You are done. This is how you can enable Fast Startup in Windows 11. If you wish to revert the change, uncheck the Turn on Fast Startup option in Step 6. So, this guide is all about how to enable Fast Startup in Windows 11 to boot quicker. I hope this article helped you! Please share it with your friends also. If you have any doubts related to this, let us know in the comment box below.