Starting with Windows 10 Build 21354, Microsoft introduced a new folder to Windows 10 containing admin tools. The new folder is called ‘Windows Tools’ and it provides direct access to certain Windows 10’s tools. If you are running the latest version of Windows 10, you will find the ‘Windows Tools’ folder in the Start menu. You just need to open the Start menu and search for the ‘Windows Tools’ folder. The folder will let you access various Windows 10 utilities like Command Prompt, Event Viewer, Quick Assist, and more. Also Read: How to Upgrade Windows 10 to Windows 11 for Free
Steps to Create Windows Tools Shortcut in Windows 10
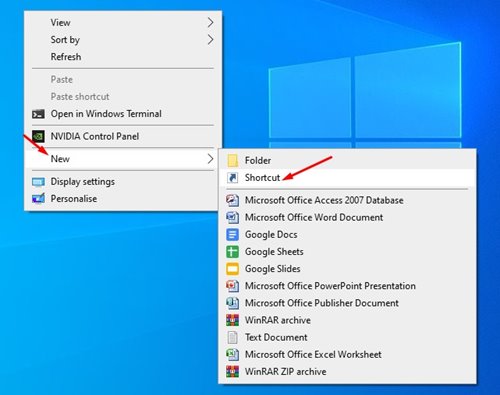
However, if you are not using the latest version of Windows 10, you need to create a shortcut for Windows tools folders. In this article, we are going to share a step-by-step guide on how to create a shortcut to the Windows Tools folder in Windows 10. Let’s check out. Step 1. First of all, right-click on the desktop and select New > Shortcut.
Step 2. On the Create Shortcut wizard, copy and paste the script given below explorer.exe shell:::{D20EA4E1-3957-11d2-A40B-0C5020524153}
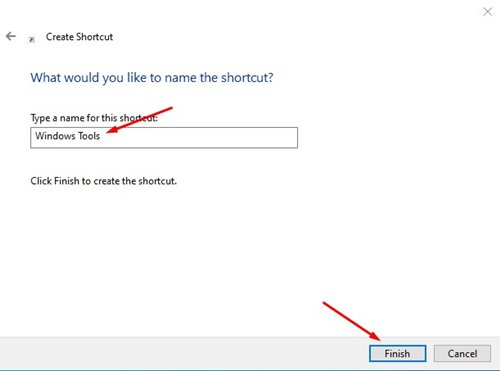
Step 3. Once done, click on the ‘Next‘ button. Now you will be asked to name the new shortcut. Simply name it ‘Windows Tools’.
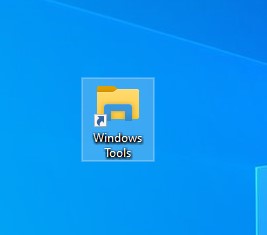
Step 4. You will find the new Windows Tools shortcut on the desktop. Double click on it to open the Windows Tool folder and access all admin tools.
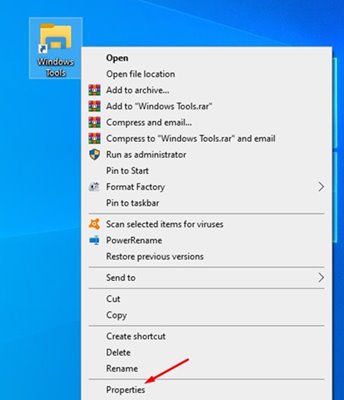
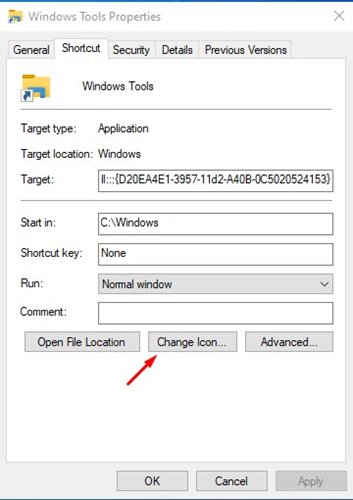
Step 5. To change the Windows Tools shortcut icon, right-click on the Shortcut and select ‘Properties’
Step 6. On the Properties, click on the ‘Change Icon’ option and select the icon of your choice.
That’s it! You are done. This is how you can create a shortcut for the Windows Tools folder. So, this article is all about how to create a shortcut to the Windows tools folder in Windows 10. I hope this article helped you! Please share it with your friends also. If you have any doubts related to this, let us know in the comment box below.
